Quick answer
A palmistry drawing is a study diagram. It maps visible lines, mounts, and hand shape so you can compare features clearly without turning the sketch into a fixed prediction.
- Draw the hand outline before labels.
- Mark only lines you can actually see.
- Use drawings to study vocabulary and context.
A palmistry drawing is a study diagram. It helps you map the life line, head line, heart line, fate line, mounts, and hand shape so you can compare visible features more calmly. A good drawing does not predict the future. It gives you a clean reference for learning palmistry vocabulary and noticing details.
Last updated: July 7, 2026.
Key takeaways
- Draw the hand outline first, then place the major lines in relation to the thumb, fingers, and palm center.
- Use labels sparingly. Too many marks make the diagram harder to read.
- Separate observation from interpretation: draw what you see before deciding what it means.
- Use a diagram with a real hand photo or direct observation, not from memory alone.
2026 update: draw before interpreting
This July 2026 refresh makes the drawing workflow stricter. A palmistry diagram should begin as a map, not a conclusion. Draw the outline, major lines, and unclear marks before adding meaning. If a line is faint, label it faint instead of forcing a confident reading.
| Diagram step | Good practice | Why it improves the guide |
|---|---|---|
| Outline | Keep the wrist, palm, and finger bases visible | Shows line location in context |
| Major lines | Use stronger strokes only for clearly visible creases | Prevents over-labeling faint marks |
| Uncertain marks | Use dotted or light labels | Preserves uncertainty for the reader |
| Interpretation notes | Put meaning after the diagram | Keeps observation separate from belief |
What changed in this refresh
The article now gives beginners a cleaner study process: map the hand first, compare it with the line guides, and use the drawing as a learning aid rather than a fixed prediction chart.
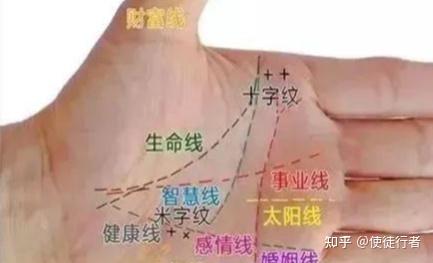
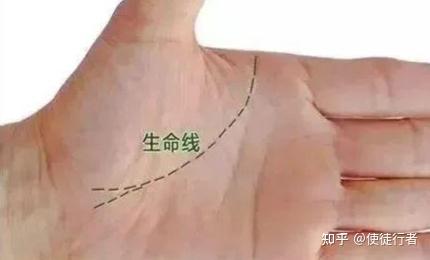
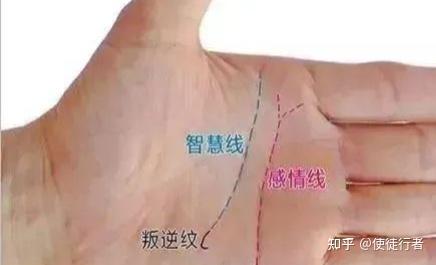
What belongs in a basic palmistry diagram?
A beginner diagram should show the palm outline, major lines, finger bases, thumb area, and a few named zones. The goal is clarity. If the page becomes crowded, readers cannot tell which line is being discussed.
| Diagram element | Where to place it | Study purpose |
|---|---|---|
| Heart line | Upper palm, below the fingers | Compare curve, start point, forks, and breaks |
| Head line | Middle palm, usually moving across the hand | Compare slope, length, and connection to the life line |
| Life line | Curves around the thumb area | Study arc, depth, and interruptions without lifespan claims |
| Fate line | Vertical line toward the middle finger, if visible | Notice career or direction symbolism in traditional readings |
| Mounts | Raised areas below fingers and around the thumb | Provide context for line interpretation |
Step-by-step: draw a clean palmistry hand
- Start with the outline. Trace the outside of the palm and fingers lightly. Keep the wrist visible if the lower life line or fate line matters.
- Add the major lines. Draw the life, head, and heart lines first. Use solid lines for clearly visible creases and lighter strokes for faint lines.
- Add secondary lines only when needed. If you are studying the fate line or sun line, add it after the main structure is clear.
- Label with short terms. Write “heart line” or “head line” near the line. Avoid long interpretation notes inside the drawing.
- Compare with a guide. Use the finished diagram beside our palm reading lines guide so your labels match the same vocabulary.
Common drawing mistakes
The most common mistake is drawing an idealized palm instead of the hand in front of you. Real lines are uneven. Some stop, fade, fork, or overlap. If your diagram makes every line smooth and symmetrical, it may look neat but it will not help you study.
- Do not draw missing lines just because a chart shows them.
- Do not label every faint wrinkle as a separate palmistry line.
- Do not use thick marker strokes that hide breaks or forks.
- Do not place interpretation text where it confuses the visual map.
How to use a drawing with an online palm reading tool
A drawing can make an AI or human reading easier to review. First, use a clear photo with the Palm Reading tool. Then sketch the same hand and mark where the tool noticed major lines. If your drawing and the tool disagree, return to the photo and check the lighting, angle, and line visibility.
This is also a useful way to avoid overconfidence. A diagram slows the reading down. You can ask, “Did I actually see this line, or did I expect it because a chart told me it should be there?”
Why diagrams help beginners
Palmistry traditions use a lot of names. Diagrams turn those names into locations. That helps beginners move from vague questions such as “what does my hand say?” to specific observations such as “where does my head line begin?” Public references like Allure’s palm-reading guide describe the practice as a traditional divination system, so diagrams should be used as learning aids rather than evidence of fixed outcomes.
A better palmistry drawing workflow
The best palmistry drawings are boring at first. Start with the hand outline, then add only the major lines you can actually see. Add labels after the sketch is stable. If you label too early, the drawing starts to copy what you expect to see instead of what is on the hand.
- Trace the palm shape lightly, including wrist and finger spacing.
- Mark the heart, head, and life lines with thin strokes.
- Add the fate line only if it is visible enough to follow.
- Use dotted strokes for faint or interrupted lines.
- Write a short note beside every uncertain mark.
Common drawing errors
| Error | Why it weakens the reading | Better fix |
|---|---|---|
| Making every line dark | It hides the difference between strong and faint features | Use line weight to show clarity |
| Adding lines from memory | It turns the diagram into an imagined palm | Mark only what is visible |
| Skipping hand shape | Lines lose context without palm proportion | Draw outline and finger length first |
| Using prediction labels | It makes the chart sound more certain than it is | Use descriptive labels and notes |
FAQ
Should I draw the left hand or right hand?
Draw the hand you are studying. If you want comparison, draw both hands on separate pages using the same scale and labels.
Do palmistry drawings need to be artistic?
No. A useful drawing is clear, labeled, and faithful to the visible hand. It does not need shading or decorative detail.
Can I use a printed palm chart?
Yes, but use it as a reference. A chart shows common locations; your own hand may not match it exactly.
What is the best first line to learn?
Start with the heart line, head line, and life line. They are usually the easiest to locate and appear in most beginner guides.
This guide is for palmistry study, cultural learning, and reflective note-taking. It does not provide medical, psychological, legal, or financial assessment.
Leave a Reply